不曉得有多少人在使用ASP.NET Identity作為網站的登入系統驗證,自己在寫專案的時候常常是事後才想到(或才知道)要有登錄系統,之前都是在MVC中使用ASP.NET的表單驗證 (FormsAuthentication),這個方法做起來很快,也比較容易理解與上手。不過
既然ASP.NET MVC的預設專案範本的個別使用者帳戶驗證是使用ASP.NET Identity,也實作好登入驗證、註冊與登出等控制流程。我也希望專案中改用ASP.NET Identity比較輕鬆愉快。本篇文章中會介紹如何把專案範本中個別使用者帳戶驗證的相關功能模組移入現有專案。
內容目錄
安裝套件
在MVC中要使用ASP.NET Identity,需要用NuGet安裝以下三個套件到現有專案中:
- Microsoft.AspNet.Identity.EntityFramework
- Microsoft.AspNet.Identity.OWIN
- Microsoft.Owin.Host.SystemWeb
安裝的過程中會連同每個套件的相依套件一併安裝,所以最後安裝下來的套件數就不只三個,此外在NuGet上可以找到這三個套件相對應的繁體中文套件(名稱後方加上.zh-Hant)安裝結果是一樣的只是多中文套件而已。安裝套件結果可以看packages.config
<package id="Owin" version="1.0" targetFramework="net472" />
<package id="Microsoft.Owin" version="4.1.0" targetFramework="net472" />
<package id="Microsoft.Owin.Host.SystemWeb" version="4.1.0" targetFramework="net472" />
<package id="Microsoft.Owin.Host.SystemWeb.zh-Hant" version="4.1.0" targetFramework="net472" />
<package id="Microsoft.Owin.Security" version="3.0.1" targetFramework="net472" />
<package id="Microsoft.Owin.Security.Cookies" version="3.0.1" targetFramework="net472" />
<package id="Microsoft.Owin.Security.OAuth" version="3.0.1" targetFramework="net472" />
<package id="Microsoft.AspNet.Identity.Core" version="2.2.3" targetFramework="net472" />
<package id="Microsoft.AspNet.Identity.EntityFramework" version="2.2.3" targetFramework="net472" />
<package id="Microsoft.AspNet.Identity.Owin" version="2.2.3" targetFramework="net472" />
<package id="Microsoft.AspNet.Identity.Owin.zh-Hant" version="2.2.3" targetFramework="net472" />
加入現有項目
安裝完套件後,接者就是把專案範本中的個別使用者帳戶驗證的相關功能例如設定檔、控制器、模型、檢視等搬到現有專案,若兩個專案名稱都取一樣的名字就可以省去更改命名空間namespace的功夫。這邊準備了專案,是我將無驗證的MVC專案範本與有使用個別使用者帳戶驗證的專案範本兩個合併的比較差異,可以比較出使用個別使用者帳戶驗證的範本相對於無驗證範本多出了哪些檔案。下列檔案我就用方案總管全部搬到新專案去。
Startup.cs
App_Start\IdentityConfig.cs
App_Start\Startup.Auth.cs
Controller\AccountController.cs
Controller\ManageController.cs
Models\AccountViewModels.cs
Models\IdentityModels.cs
Models\ManageViewModels.cs
Views\Account\*.cshtml
Views\Manage\*.cshtml
Views\Shared\Lockout.cshtml
Views\Shared\_LoginPartial.cshtml
更改設定
另外還有Web.config、IdentityModels.cs和_Layout.cshtml需要手動修改
更改_Layout.cshtml
改Layout比較簡單,就是將登入註冊按鈕的_LoginPartial.cshtml加入置頂列中
<div class="navbar-collapse collapse">
                <ul class="nav navbar-nav">
                    <li>@Html.ActionLink("首頁", "Index", "Home")</li>
                    <li>@Html.ActionLink("關於", "About", "Home")</li>
                    <li>@Html.ActionLink("連絡人", "Contact", "Home")</li>
                </ul>
                @Html.Partial("_LoginPartial")
            </div>
更改Web.config
而在Web.config中要增加CodeFirst資料庫連結字串,如果用DBfirst產生的資料庫連線字串如下,providerName是System.Data.EntityClient這個組件,連線字串還包含著metadata、MultipleActiveResultSets與App參數
<connectionStrings>
    <add name="MyDBEntities" connectionString="metadata=res://*/Models.MyDBModel.csdl|res://*/Models.MyDBModel.ssdl|res://*/Models.MyDBModel.msl;provider=System.Data.SqlClient;
provider connection string="data source=(local)\SQLEXPRESS;initial catalog=MyDB;integrated security=True;MultipleActiveResultSets=True;App=EntityFramework"" providerName="System.Data.EntityClient" />
</connectionStrings>
若直接使用DataBaseFirst的連線字串可能會出現的錯誤訊息有不支援關鍵字: 'metadata'或是System.InvalidOperationException: The entity type ApplicationUser is not part of the model for the current context.又或者是System.Data.Entity.Core.MetadataException: Unable to load the specified metadata resource等等
所以,這邊我們在connectionStrings裡面加入我們CodeFirst用的連線字串,並更改為我們自己用的資料庫路徑
<connectionStrings>
...
    <add name="CodeFirstEntities" connectionString="data source=(Local)\sqlexpress;initial catalog=AspNetIdentityTest20200222;integrated security=True;" providerName="System.Data.SqlClient" />
</connectionStrings>
更改IdentityModels.cs
然後再至Models\IdentityModels.cs檔案,更改使用的資料庫連結自串為我們剛剛設定的CodeFirst用連線字串
public class ApplicationDbContext : IdentityDbContext<ApplicationUser>
{
    public ApplicationDbContext()
        : base("CodeFirstEntities", throwIfV1Schema: false)
        {
        }

    ...
}
執行專案
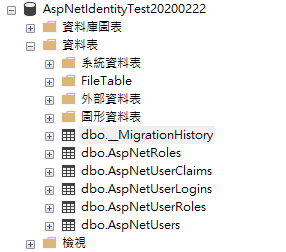
查看資料庫
現在啟動專案,便可以看到系統已經幫我們自動建立ASP.NET Identity所需要的資料表,並在__MigrationHistory資料表中留下更動紀錄

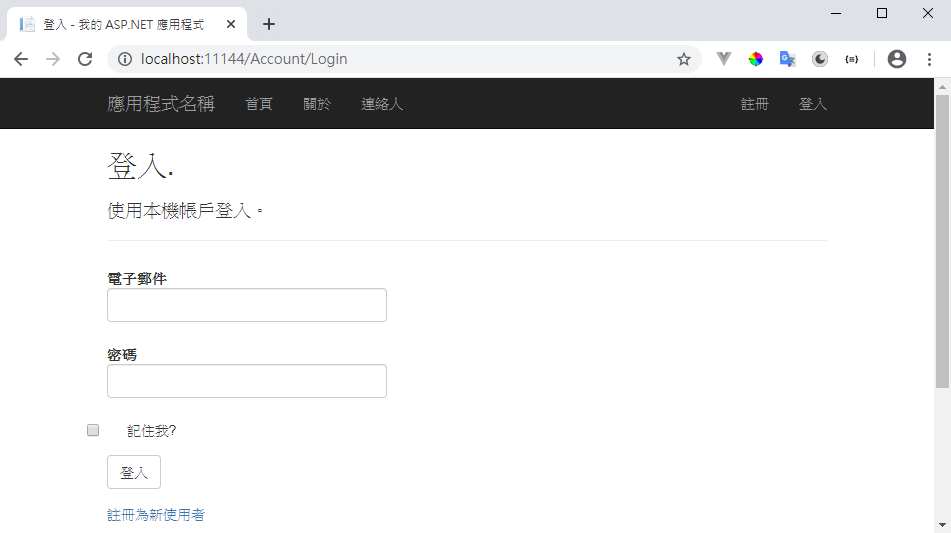
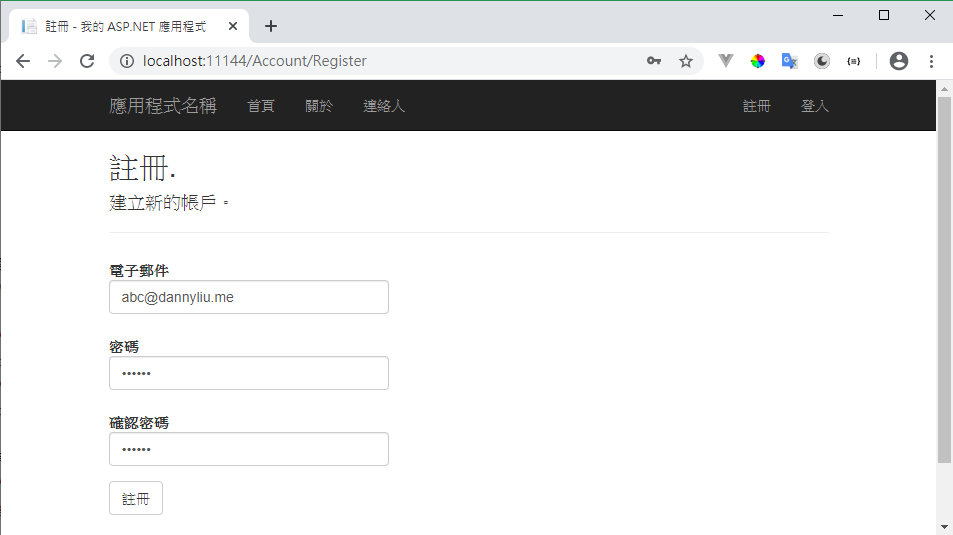
測試註冊、登入
可以看動我們的專案已經有註冊、登入等功能可以使用了

參考資料:
C# ASP.NET MVC 手動將 Identity 加入現有專案
將 ASP.NET Identity 加至 ASP.NET MVC Empty 專案中